

BIZOMAT Customer Relationship Management (CRM)
How to use the CRM
Step by step, from your first organisation to reports and automations. Every button and field is named as it appears in the application.
Step 1 of 15
Sign in or create an account
Open the CRM
Go to bizomat.ai/crm, or choose Sign in, then Customer Relationship Management, at the top of any BIZOMAT page.
Sign in
Use your BIZOMAT email and password. If you use Project Management, it is the same account, and signing in to one signs you in to both.
New to BIZOMAT?
Choose Create an account and enter your full name, work email and a password. If BIZOMAT asks you to confirm your email address, open the link in the email it sends, then sign in.
Step 2 of 15
Create your organisation
An organisation is one business, or one team, that keeps its own customers, pipelines, people and settings. You can belong to several.
Name it
The first time you sign in, the CRM asks you to create an organisation. Enter its name and, if you like, its industry, website and country.
Choose its currency
Every amount in the organisation uses it. You can change it until the first deal is created.
Create organisation
You become its owner. It starts with a 5-stage sales pipeline and 7 automations, and no sample records.
Switch organisations
Open the organisation menu at the top left to move between your organisations, or choose Create or join an organisation.
Details and logo
Settings, Organisation holds the organisation's details, its logo and its time zone.
Step 3 of 15
Invite your team and choose roles
Invite someone
Open Team, then Invitations. Enter the person's email address, choose their role, add a message if you like, and choose Send invitation.
Email or link
BIZOMAT emails the invitation when its email service is set up. Otherwise the CRM shows an Invitation link: copy it and send it yourself.
Accepting
The person opens the link and signs in, or creates an account, with the invited email address, then accepts. An invitation works once and expires after 14 days. Send again makes a new link; Withdraw cancels it.
Members
Under Members, change a person's role or remove them. When you remove someone, you can hand their records and open activities to a colleague.
Teams
Under Teams, group people (by region or product, for example) and name a team lead. The dashboard and reports can then be filtered by team.
The 6 roles
- Owner: Everything, including handing over ownership and deleting the organisation. Each organisation has exactly one.
- Administrator: Everything else: members, roles, permissions, settings and every record.
- Manager: All records, pipelines, fields, lists, products, automations and teams. Invites people but does not change roles.
- Sales Executive: Sees all records and adds new ones; edits and deletes the records they own; sees reports. No import or export.
- Member: Sees all records, adds new ones and edits the ones they own. Never deletes.
- Viewer: Reads everything their organisation allows, and changes nothing.
Owners and administrators can adjust the other four roles in Settings, Permissions (step 15).
Step 4 of 15
Set the CRM up for your business
Everything here is in Settings. Owners, administrators and, for most of it, managers can change it.
Pipelines and stages
Rename the stages, add your own, set each stage's probability, or add more pipelines, for example one for new business and one for renewals.
Statuses and lists
Lead statuses, lead and contact sources, activity types, lost reasons, company and contact statuses, and industries.
Custom fields
Your own fields on leads, contacts, companies and deals, of 11 types: text, long text, number, amount, date, dropdown, multiple choice, checkbox, web address, email and phone.
Tags
Coloured labels to put on any record, then filter by.
Products and services
A catalogue with prices, to add to deals.
Email templates
Reusable emails for logging an email to a contact.
Step 5 of 15
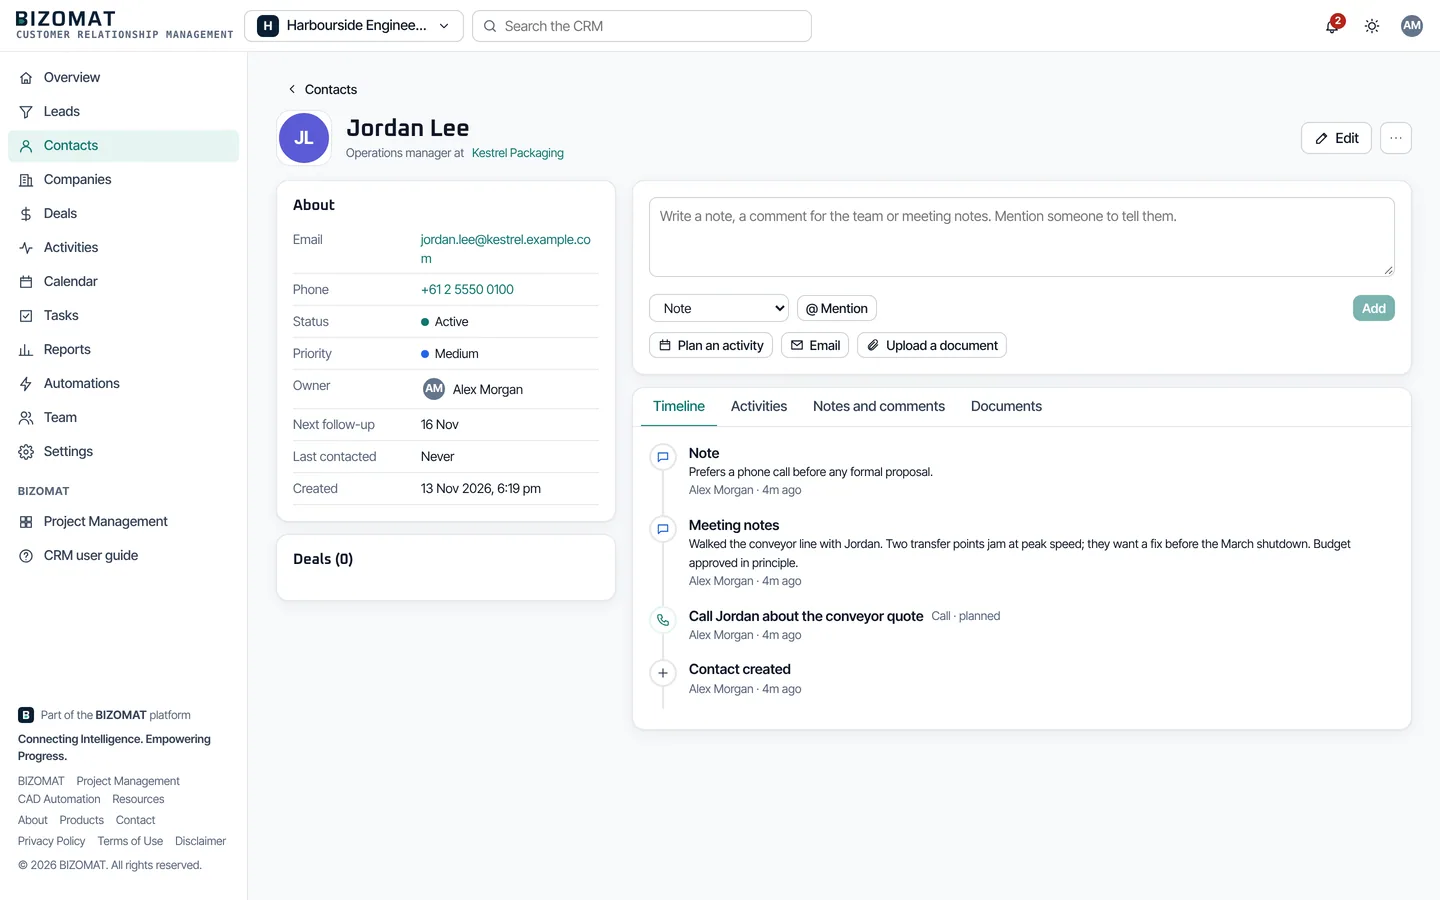
Add contacts and companies
A company
Open Companies and choose New company. Enter its name and anything else you know: website, industry, size, phone.
A contact
Open Contacts and choose New contact. To link the person to a company, type part of its name in Company and pick it from the list. A contact can have more than one email address and phone number.
Duplicates
If an email address, phone number or name matches someone you already have, the CRM warns you before you create a second record.
Import from a CSV file
On Contacts, Companies or Leads, choose Import and pick the file. Match each column to a field, or leave it out, choose whether duplicates are skipped, updated or created, then import.
Step 6 of 15
Capture, score and convert leads
A lead is someone who may become a customer: an enquiry, a referral, a name from a trade show.
New lead
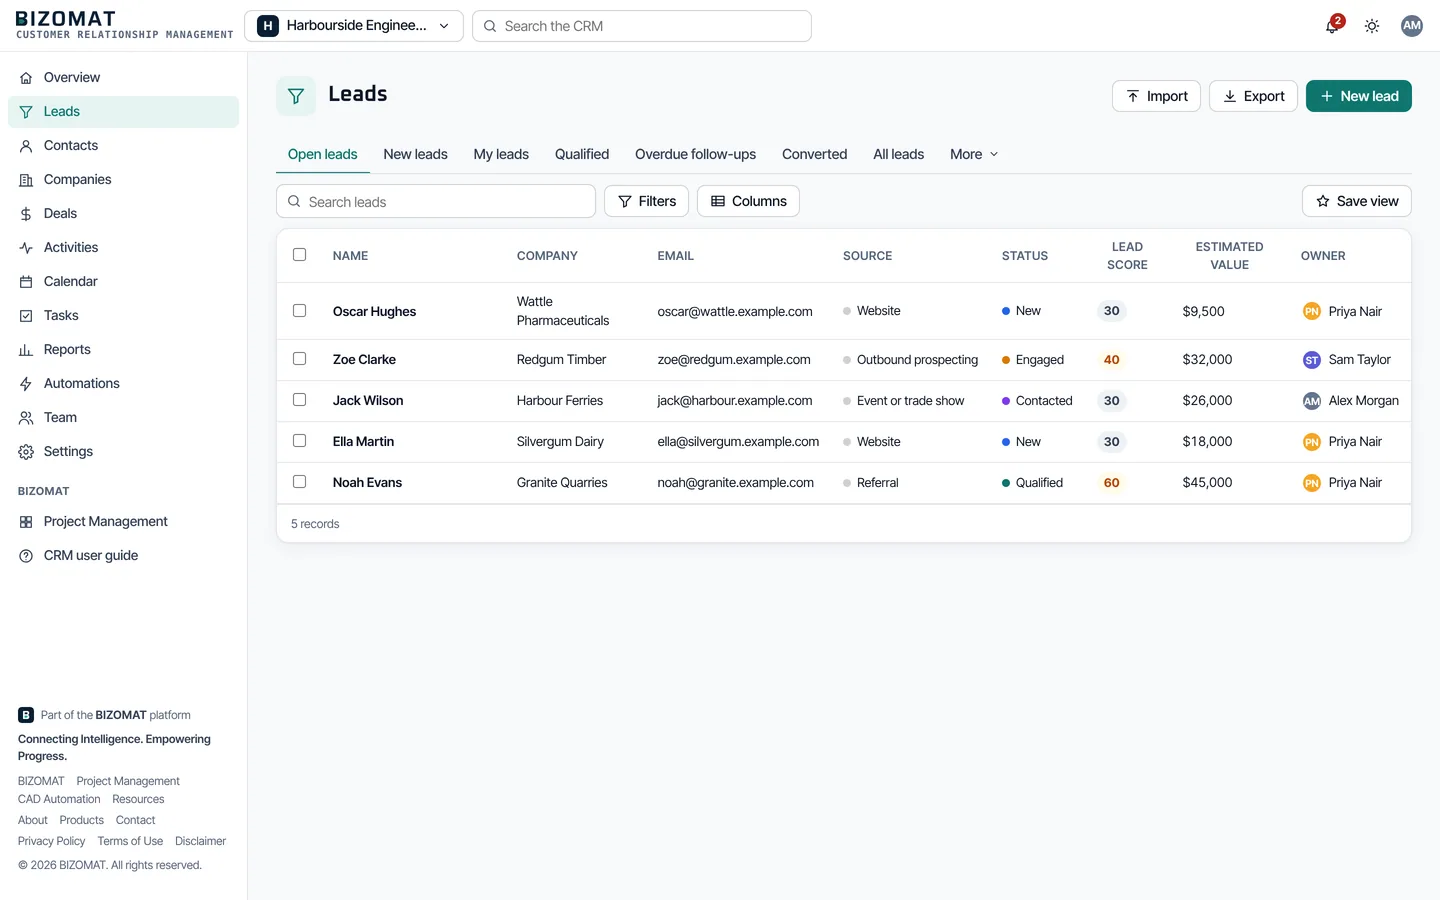
Open Leads and choose New lead. Record who it is, their company, how they found you (the source) and an estimated value.
Work it through its statuses
New, Contacted and Engaged while you work it, then Qualified or Unqualified. Converted is set for you.
Read the score
The lead score on the lead shows the points behind it. If you know better, set it by hand in Edit; clear it to let the CRM calculate it again.
Convert
When the lead is ready, choose Convert. Choose a new or existing contact, a new or existing company (or none), and whether to create a deal with its title, value, expected close, pipeline and stage.
Once only
A lead converts once, and its activities move to the new records. If a contact with the same email address exists, the CRM offers to use it instead.
Step 7 of 15
Work deals on the pipeline board
The board
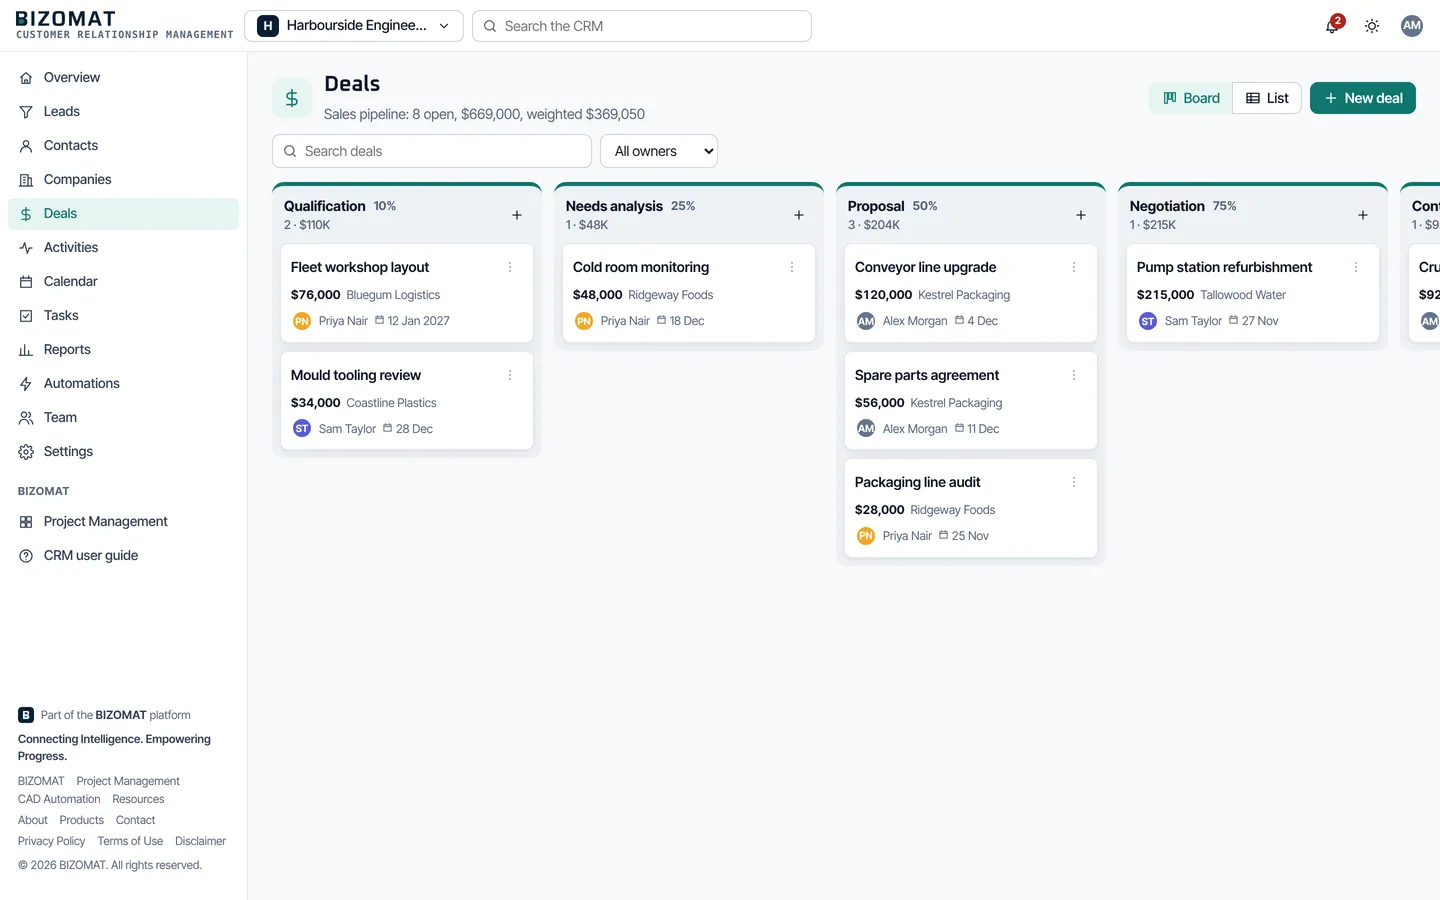
Open Deals. Board shows each stage with its number of deals and their value; List shows the same deals as a table.
New deal
Choose New deal, or the + at the top of a stage, and enter its title, value, company and expected close date.
Move it
Drag a card to another stage. Without a mouse, open the card's menu and choose the stage.
Win or lose it
Drag the card onto Won or Lost, which appear while you drag, or use the card's menu, or Won and Lost on the deal itself. A lost deal asks for the reason.
Products and services
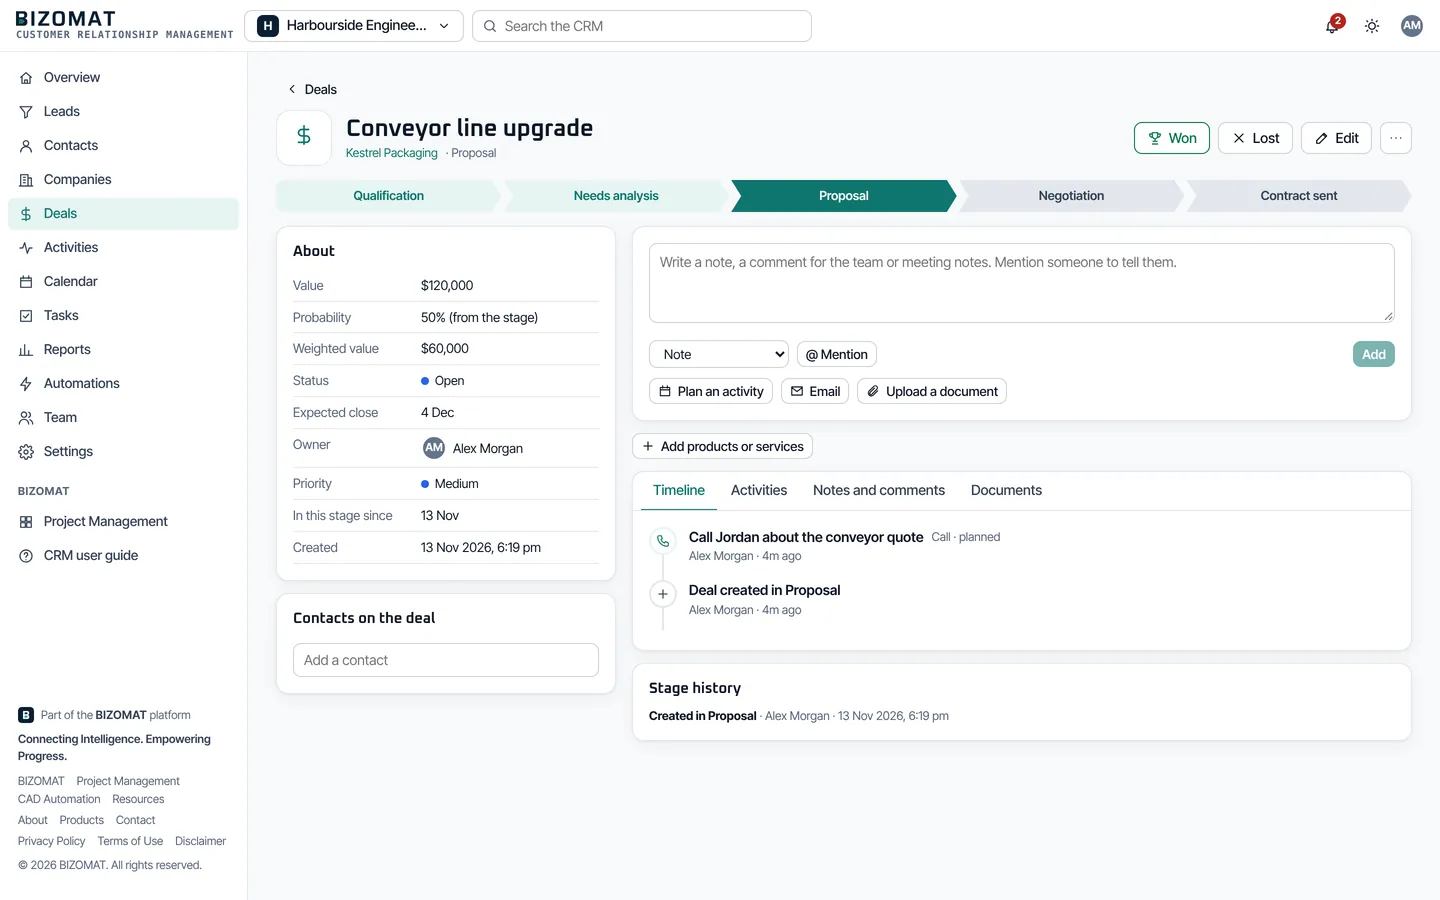
On the deal, add lines from your catalogue or new ones, with quantity and discount. The deal's value then becomes their total.
People and history
Contacts on the deal shows who is involved. Stage history shows when the deal moved and how long it spent in each stage.
Step 8 of 15
Plan activities and follow-ups
New activity
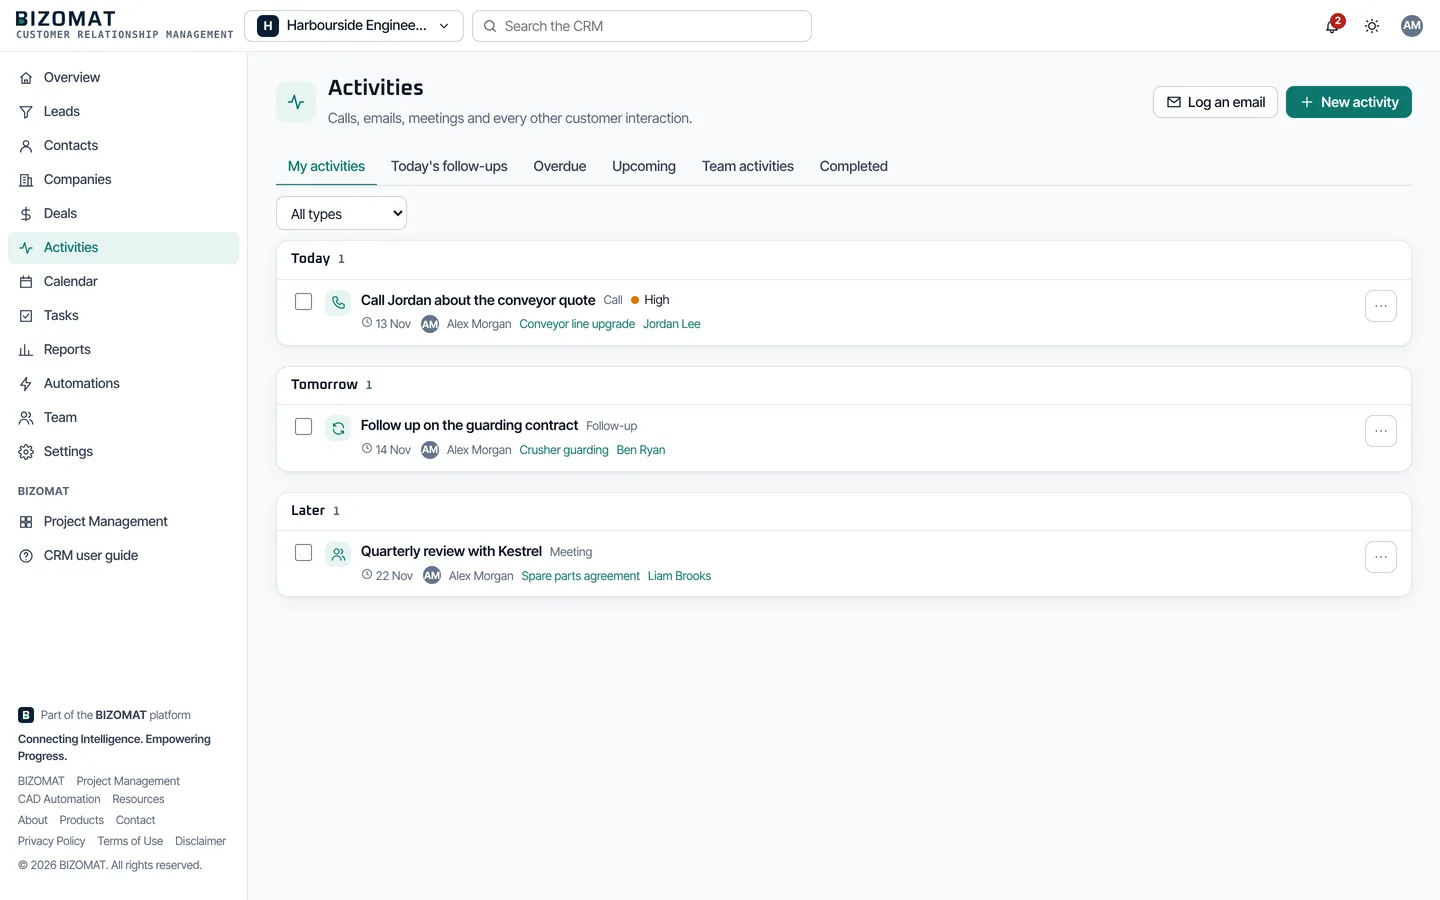
Open Activities and choose New activity, or use Plan an activity on a contact, company, lead or deal.
What, when and who
Choose the type (call, email, meeting, appointment, follow-up, presentation, demonstration, proposal, customer visit, task and general), a title, the due date and time, a priority and who it is assigned to.
Your lists
The tabs show My activities, Today's follow-ups, Overdue, Upcoming, Team activities and Completed.
Complete it
Tick the box to complete an activity. Open it to record the outcome.
Tasks and Calendar
Tasks lists tasks and follow-ups for you and your colleagues; Calendar shows activities by month.
Elsewhere
An activity's menu has Add to my calendar (.ics) and Create a project task, which puts it in a Project Management project with a link back.
Step 9 of 15
Notes, documents and the timeline
Write it down
On any record, write a note, an internal comment or meeting notes, and choose Add. Mention a colleague with @ to notify them.
Pin what matters
Pin a note to keep it at the top.
Documents
Upload a document and choose its kind: proposal, quote, contract or other. Upload a new version later; earlier versions are kept.
The timeline
Timeline lists everything about the record, newest first: changes, activities, notes and documents. A company's timeline includes its contacts and deals.
Archive and delete
Archive a record you no longer need, or delete it. Deleted records move to Deleted, where they can be restored.
Step 10 of 15
Log emails
Write
On Activities choose Log an email, or Email on a record. Pick the contact, a template if you like, and write the email.
Send from your own email
Choose Open in my email and log: your mail program opens with the email filled in, ready to send. Choose Log only to record an email you have already sent.
What the CRM keeps
The email is logged on the contact's timeline. BIZOMAT does not send it, and it does not read your mailbox: Gmail and Microsoft 365 synchronisation is not available yet.
Step 11 of 15
Search, filters, views and bulk changes
Search
Search the CRM, at the top, looks through contacts, companies, leads, deals, activities and notes. Press Ctrl+K (Cmd+K on a Mac) to jump to it.
Built-in views
The tabs above a list are ready-made views, such as Open leads, My leads, Closing soon or Won deals.
Filters and columns
Filters narrows the list by any field, tag or custom field, matching all or any of your conditions. Columns chooses what the list shows; click a heading to sort.
Save view
Keeps the filters, sort and columns under a name. Managers and administrators can share a view with everyone.
Bulk changes
Tick records to change them together: assign, change status or priority, tag, archive, delete or restore.
Export
Export downloads what the list shows as a CSV file, if your role allows export.
Step 12 of 15
Read the dashboard and reports
Overview
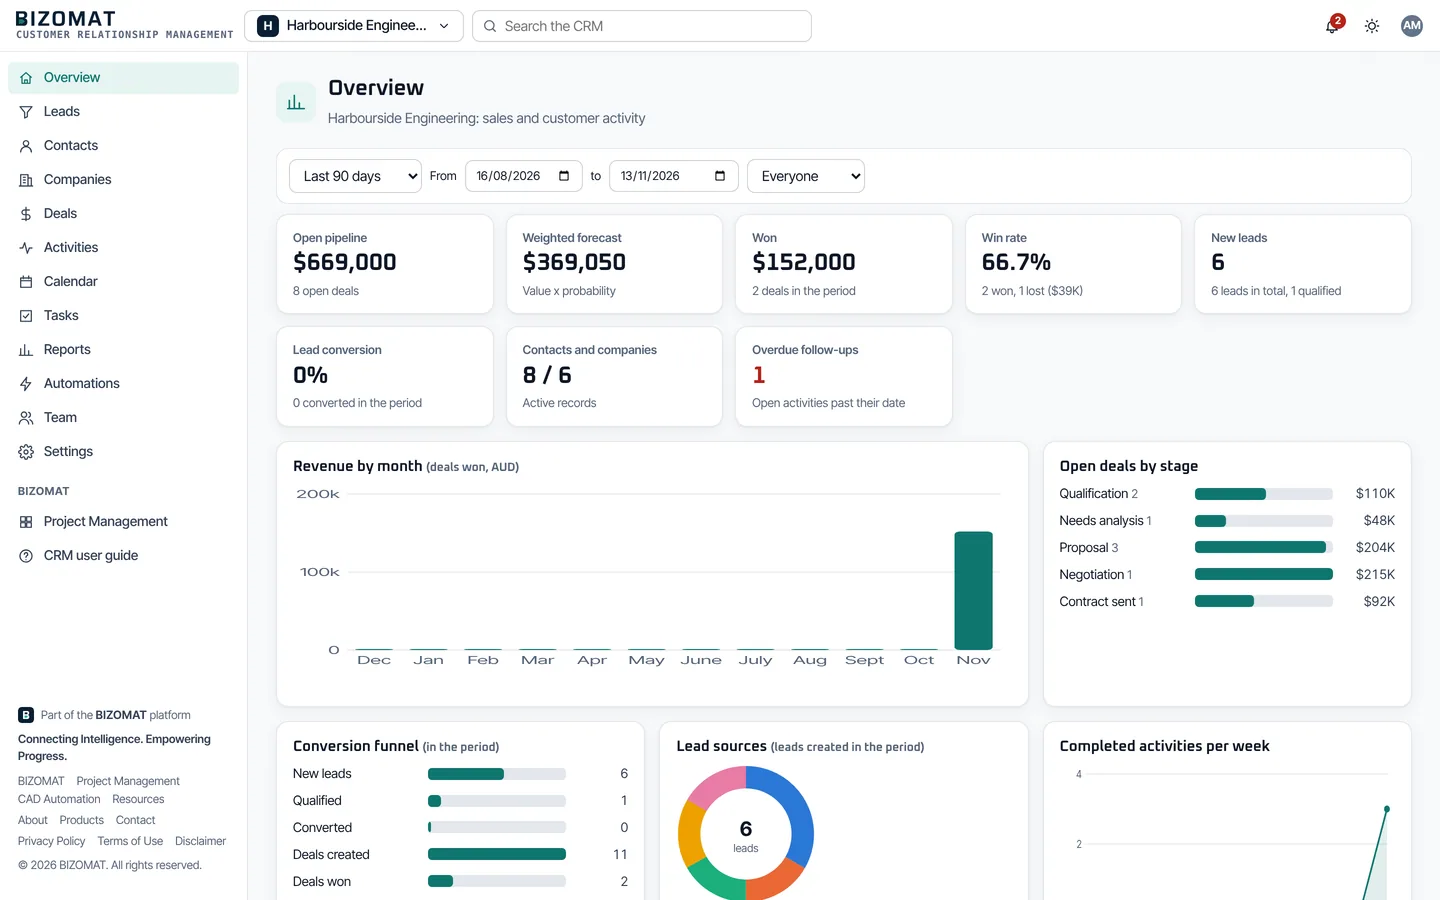
The dashboard: open pipeline, weighted forecast, value won, win rate, new leads, lead conversion, contacts and companies and overdue follow-ups, with charts below.
Filter it
Choose a period or exact dates and a person; where you have them, a team and a pipeline.
Reports
11 reports: Lead conversion, sales pipeline, revenue, won and lost deals, salesperson performance, lead source performance, activities, monthly and quarterly trends, forecast revenue, deal ageing and sales cycle duration.
Export
Each report shows its figures, a chart and a table. Export CSV downloads it.
Step 13 of 15
Automate routine follow-ups
The seven to start with
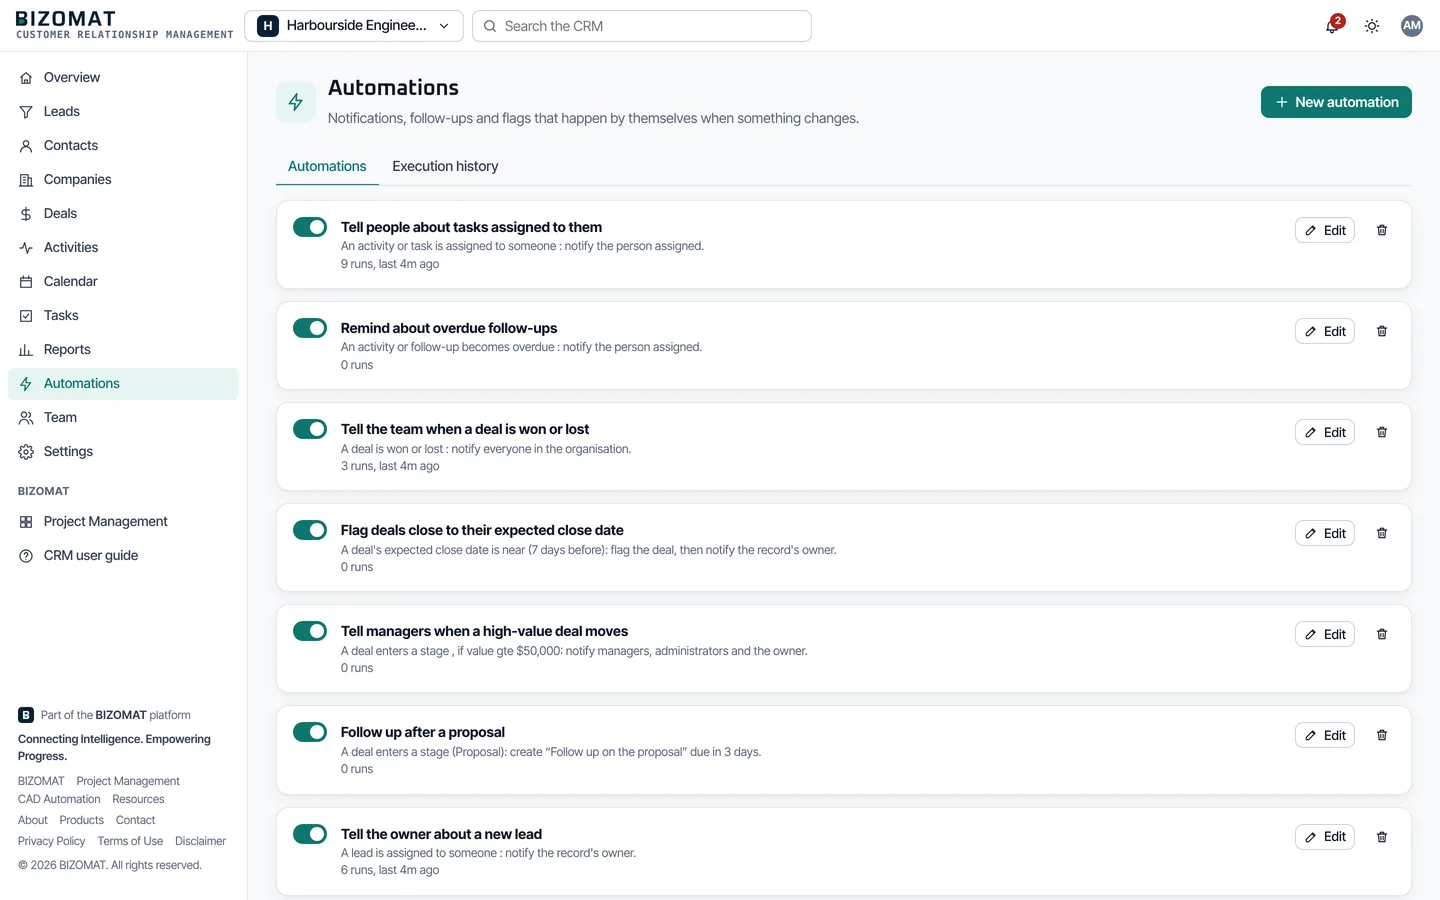
Open Automations. Every organisation starts with: Tell the owner about a new lead, remind about overdue follow-ups, tell managers when a high-value deal moves, follow up after a proposal, tell people about tasks assigned to them, flag deals close to their expected close date and tell the team when a deal is won or lost. Switch each on or off, or choose Edit.
Your own
Choose New automation and start from a template or build your own: When (the trigger), Only if (optional conditions) and Then (one or more actions).
When it runs
Most automations run straight after the change. Deals close to their expected close date and overdue activities are checked every 15 minutes, and each record fires once.
History
Execution history lists every run and its result.
Step 14 of 15
Notifications and your calendar
The bell
The bell shows your notifications in this organisation; the organisation menu shows how many are unread in the others.
Choose what you get
Settings, My notifications sets each kind of notification In BIZOMAT, By email, or both.
Calendar feed
Settings, Calendar feed: choose Make my calendar address and add it to your calendar app as a subscription. Make a new address or Stop the address at any time.
Step 15 of 15
Permissions, audit trail and leaving
Permissions
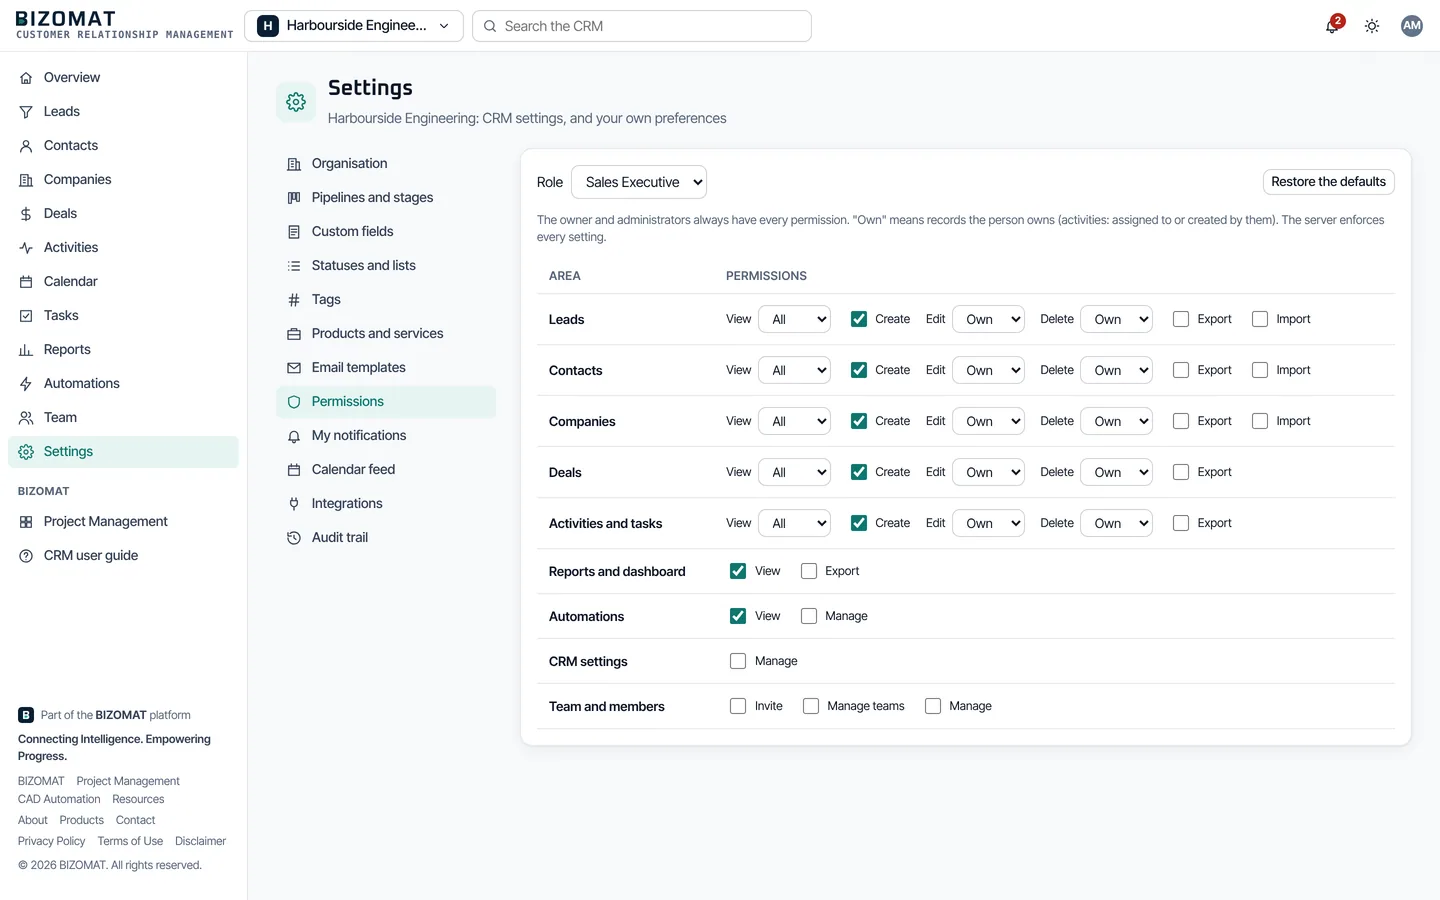
Owners and administrators: Settings, Permissions. Choose a role, then for each area set View, Edit and Delete to All, Own or None and tick Create, Export and Import. Restore the defaults undoes your changes.
Audit trail
Settings, Audit trail lists who changed what, including imports and exports.
Transfer ownership
The owner can hand the organisation to another member on Team; the previous owner becomes an administrator.
Leave
Anyone but the owner can leave an organisation from Team.
Delete the organisation
The owner, in Settings, Organisation, after typing its name. Every member loses access at once.
Common questions
Before you ask
- Is the CRM the same as Project Management?
- No. They are two BIZOMAT products that share one account. The CRM is for customers and sales; Project Management is for projects and tasks. An activity in the CRM can become a task in Project Management.
- Can I belong to more than one organisation?
- Yes. Create as many as you need, or accept invitations to others, and switch between them from the organisation menu. Each keeps its own customers, people and settings.
- Does the CRM send emails to my customers?
- No. You send them from your own mail program and the CRM logs them. BIZOMAT only sends its own invitations and notifications.
- Can I bring my data from another CRM?
- Yes, for contacts, companies and leads: export them from the other system as a CSV file and use Import. Deals and activities are added in the CRM itself.
- Who can see my organisation's customers?
- Only its members, as their roles allow. People outside the organisation cannot see it or tell that it exists.
Something not covered here? Contact BIZOMAT.